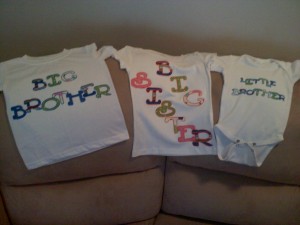
I wanted some applique shirts for sibling shirts for our kids when they came to visit their new brother in the hospital (and for pictures of the three of them later on) and after looking at the prices those types of shirts go for, I decided the frugal side of me couldn’t handle paying that kind of pricing when clearly I could make something like that myself!! 🙂
While I am going to focus on directions on how to create applique shirts using the Cricut machine in this post, you can just use stencils/freehand and scissors to cut your applique out of fabric and follow all my other steps to create the same end result. I just wanted to use my cricut so I didn’t spend forever cutting every little letter out by hand.
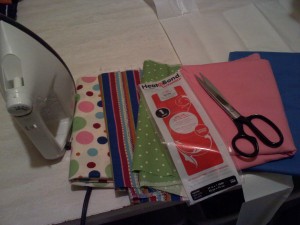
Supplies Needed:
- Prewashed Shirt (or whatever item you may want appliqued… towels, bags, pants, etc)
- Fabric (your choice on how many patterns/colors you want)
- Heat-N- Bond (I chose the no-sew because I didn’t have time to add stitching to the edges but you could do either depending on what you want to achieve)
- Iron
- Scissors
- Stencils or Cricut Machine
- Blue Painter’s tape (if using cricut)
Directions:
- Decide which fabrics you want to use and estimate how much of each fabric you will need for what you want placed on your shirt. Then cut off the same amount of Heat-N-Bond to adhere to the backside of the fabric.
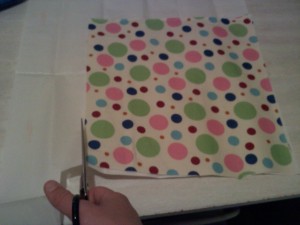
- Iron on the Heat-N-Bond to the backside of your fabric and allow to cool.
- Peel backing off Heat-N-Bond.
- Place the fabric material onto your cricut mat with the Heat-N-Bond facing up (so the viewable part of your fabric will be facing down) and smooth down tightly to the mat. Adhere additionally using blue painter’s tape to ensure the fabric will not move during cutting.
- I HIGHLY recommend using a brand new blade on your cricut machine to cut with. I actually attempted this with my current blade and could not get it to cut through my fabric. I was shocked at what a difference a new blade was even though my current one had not been used very much.
- Select your letters or designs to cut into your fabric and the size you would prefer they be. You may want to do a test run of the size with paper before cutting into your fabric (because yes, I speak from experience. One of my shirts had letters that would not fit horizontally as I had planned because I cut to big.) Make sure you also select the mirror or “flip” key so that your letters cut backward since your fabric is facing down.
- Place your blade setting to 5, speed to low, pressure to maximum. I played with these settings some but for me those cut best.

- Start cutting on the cricut. I also held the fabric lightly to keep it from moving as the cricut cut.
- Once finished, peel off your fabric pieces and lay them out on your shirt until you get the desired layout you are wanting before adhereing.
- Iron on the applique letters or graphics and you can call your project complete if you want!
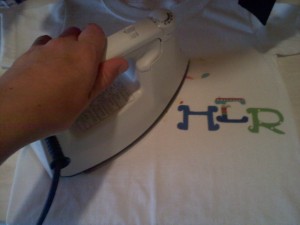
Other options to complete:
- You could stitch around each letter/graphic with a sewing machine. I think this looks great but is very time consuming and not something I was able to do when completeing this project.
- You can also use fabric markers to trace the letters/graphics to make them stand-out. It doesn’t look as good as the stitching, but I ended up having to do so because one of my fabrics I chose was blending in with my white shirt and you couldn’t make out what the shirt said as well.
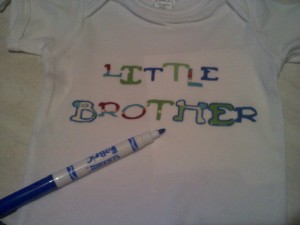
If you are considering cutting with your cricut, you may have to play with the setting adjustments. The post I read online actually recommended your settings be 4-4-4 and that didn’t work for me at all. I had to play with them alot, and it still wasn’t perfect. After cutting, I read someone had sprayed their fabric with spray startch prior to applying the Heat-N-Bond and had even greater sucess. If you try it, let me know how you think it works! That’s on my list to try next time around.

 Leandrea is a married mom of two girls, ages 13 and 12, living in Atlanta, GA. She is passionate about helping people save money one coupon at a time. Read more