As we make upgrades to our house I am showing you frugal updates that homeowners can do fairly easily. Trust me when I say that my husband and I are not carpenters! After our Powder Room Redo we had the confidence to tackle the upstairs bathrooms and we knew that framing the bathroom mirrors was a must.

How to Frame a Bathroom Mirror
Materials Required
Miter Saw or if you know you will never use a miter saw again get the much more frugal Miter Box with Saw
Caulking Gun
Caulk
Molding – from your local home improvement store. We paid about $16 for the molding
Measuring Tape
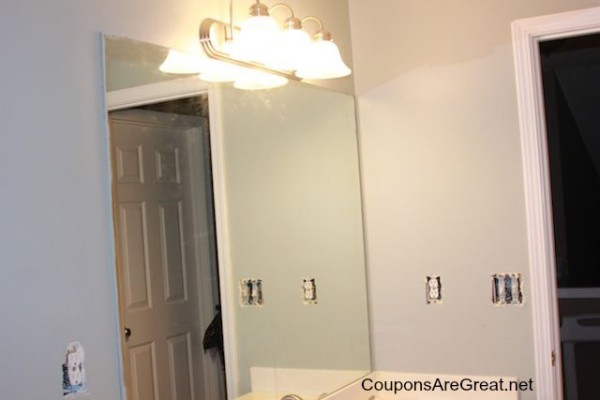
Here is a picture of our starting point. After some trial and error we replaced the horrendous broadway lights with that light strip that we found online. The hole for the light is not centered on the mirror, so we had to do a strip or we would have had to redrill, fill a big hole, and more.
My husband took the required measurements with the tape measure and headed to the garage where he used the miter saw to cut the molding to the right length and angle. If this is your first time using a miter be sure to find some videos on youtube on how to use this to get the angles you want. Also, buy some cheap molding to practice with.
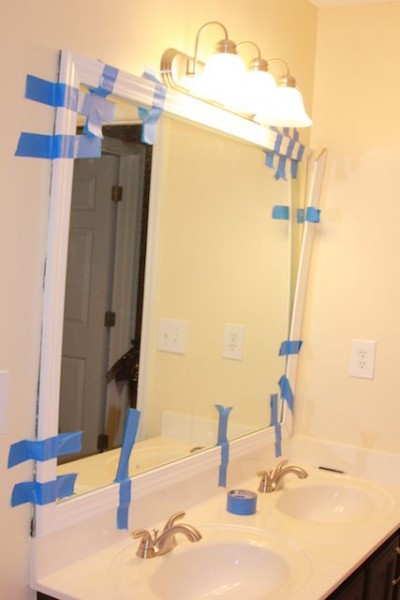
We taped our pieces up just to make sure they were a perfect match. It was, so we took off the painter’s tape and prepared for what was next.
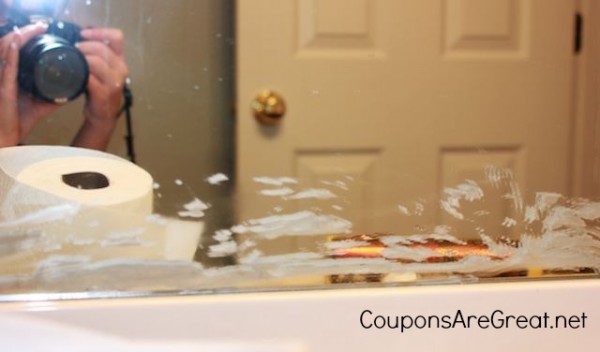
Now you are ready to apply the caulking using the caulking gun. Do NOT, I repeat, do NOT apply the caulk to the top edge of the molding. It WILL show in the reflection in the mirror and you will have to remove it.
It’s a mess, but manageable with a razor blade.
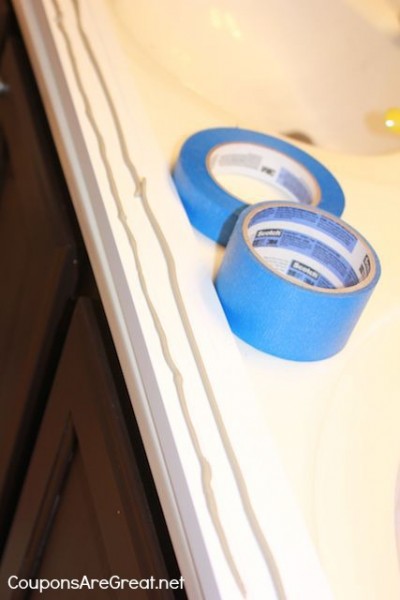
Now that you know the wrong way to apply the caulk and you have seen the mess it makes you will not make the same mistake we did. Instead, apply caulk about 3/4 of an inch from the top of the molding. You can use straight lines and don’t need to be wavy.
Adhere all four pieces of trim to the mirror. Believe it or not, the caulk/liquid names is incredibly strong and will hold almost immediately.
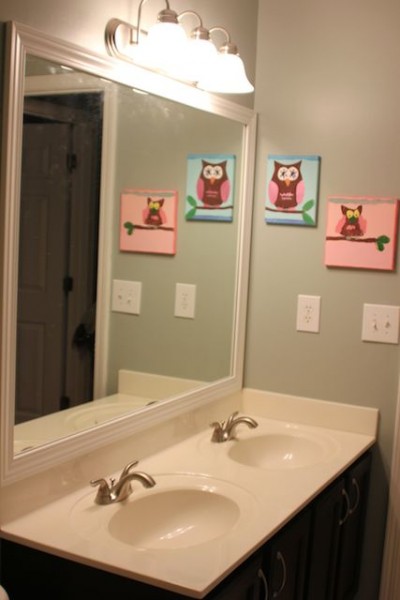
Step back and admire your work!
If you have any home improvement projects that you would like to have featured on Coupons Are Great be sure to Email Me.
![]()
We love crafting! Be sure to check out our Craft Posts for more ways to create fun, frugal crafts and projects at your house! The DIY Towel Hooks tutorial is incredibly easy and very cute (and they are also in the same room as this mirror update). If your pantry is feeling blah, use modge podge and wrapping paper to create a dramatic update in this Update Your Pantry project.

 Leandrea is a married mom of two girls, ages 13 and 12, living in Atlanta, GA. She is passionate about helping people save money one coupon at a time. Read more