
Lady bug hair bows are both cute and incredibly easy to make! There are so many reasons to follow this ladybug hair bow tutorial. They look adorable in hair (make two for pig tails!). They would also be an incredibly cute party favor for a ladybug or garden themed birthday party. Children are able to help glue googley eyes to these bows. Whatever reason you decide to make these cute little hair bows, you will not be disappointed!

![]()
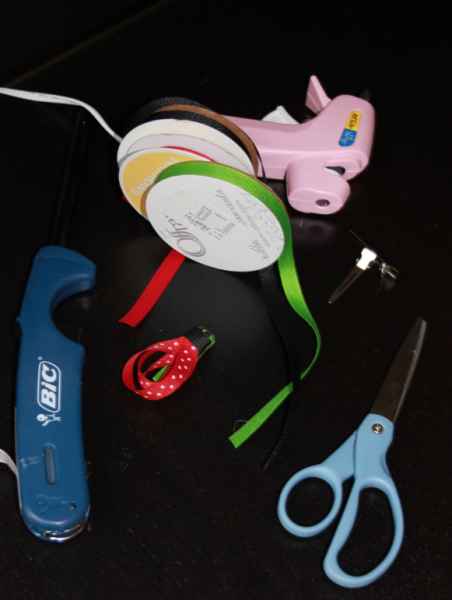
Ladybug Hair Bow Materials
- Scissors
- Glue Gun (super glue works as well)
- Ribbon – red & white polka dot, black, green
- Lighter
- Ruler (Optional)
- Hair Clips – you can also get these at beauty supply stores
Ladybug Hair Bow Tutorial
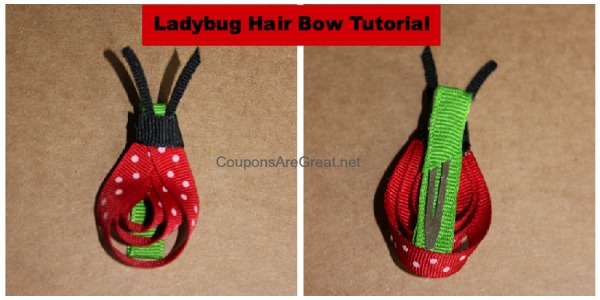
Start this project by covering the hair clip with green ribbon. Use the lighter to lightly burn the edges of the ribbon before you glue it to the hair clip.

Create three different lengths of red & white polka dot ribbon. The pieces I used were 4 inches, 3 inches, and 2 inches. Wrap each ribbon around on itself so it creates a ladybug body. Glue and pinch closed. When you have all three of these loops complete glue them together to form a ladybug body.

Wrap a piece of black ribbon around the top of the ribbon. Glue in place on the back. Pinch all the ribbon together so it is a nice tight fit.

Cut a piece of black ribbon about 1.5 inches long. This will be a bit longer than you need. Cut two antennae from the ribbon. You will basically cut out a strip of ribbon from the middle and be left with 2 pieces of black ribbon that are professionally edged on one side. Using the lighter lightly burn the cut edges of the black ribbon. This may cause the ribbon to bend a little, which is perfectly fine.
Glue the antennae to the back of the ladybug head. (You could also glue this to the red ribbon before you complete the step in the photo above…it’s totally up to you).
Glue the fully finished ladybug onto the green hair clip.
If you are looking for more hair bow tutorials check out this Butterfly Hair Clip tutorial .

![]()
We love crafting! Be sure to check out our Craft Posts for more ways to create fun, frugal crafts and projects at your house!
 Leandrea is a married mom of two girls, ages 13 and 12, living in Atlanta, GA. She is passionate about helping people save money one coupon at a time. Read more
That is adorable!!
Thank you Shelley! I hope you make it to surprise someone you love. It will definitely put a smile on your face…and theirs too!